Hello Loves!
I just wanted to touch base with you all! I know that I have been kind of silent on both blog fronts! I've been extremely stressed out with some stuff and haven't felt much up to blogging. I do have a question though!
I'm going to be doing quite a lot of baking in the up coming future. Would you like to see just baking posts or should I vary it with other types of food posts and the like?! I definitely do still want to do the facts once a week, I just have to start setting them up in the like. I'm just curious about what types of posts you all would like to see food wise!
xxAutumn

Sunday, December 30, 2012
Monday, December 24, 2012
Food Fact #1

Broccoli was once banned from Air Force One!
It did not make a triumphant return until 1994 when Bill Clinton took Office

Who wouldn't want broccoli! Pish posh is what I say! I'm glad Clinton brought it back into the white house. It's very good for you and VERY full of nutrients!
xx

Thursday, December 20, 2012
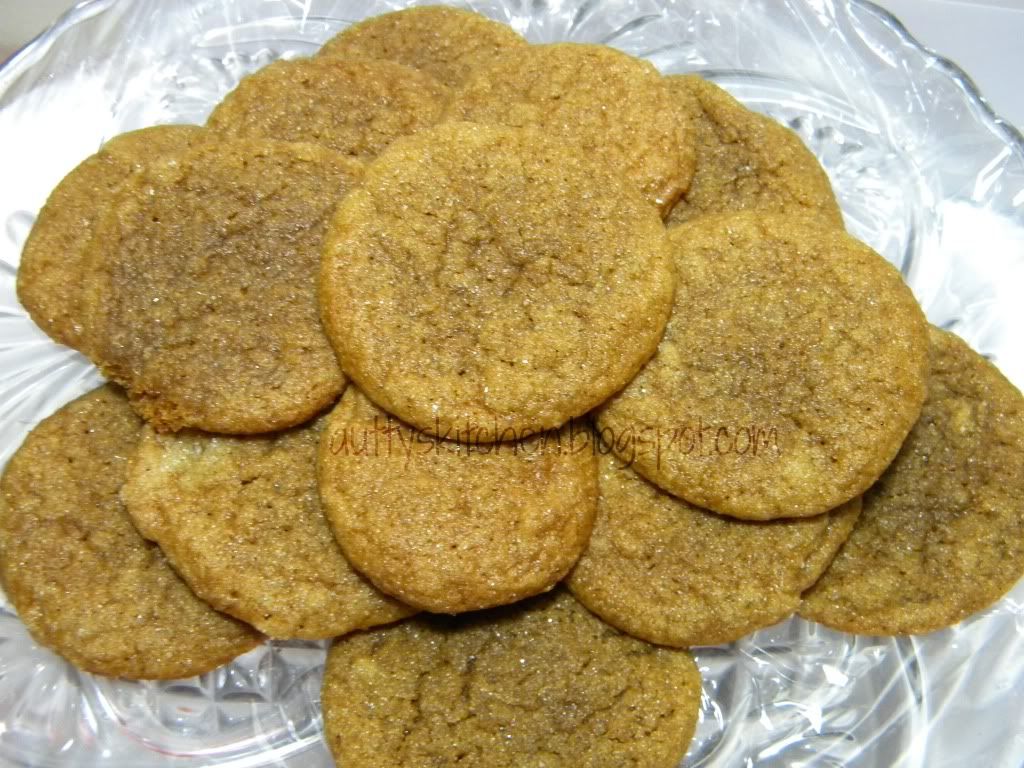
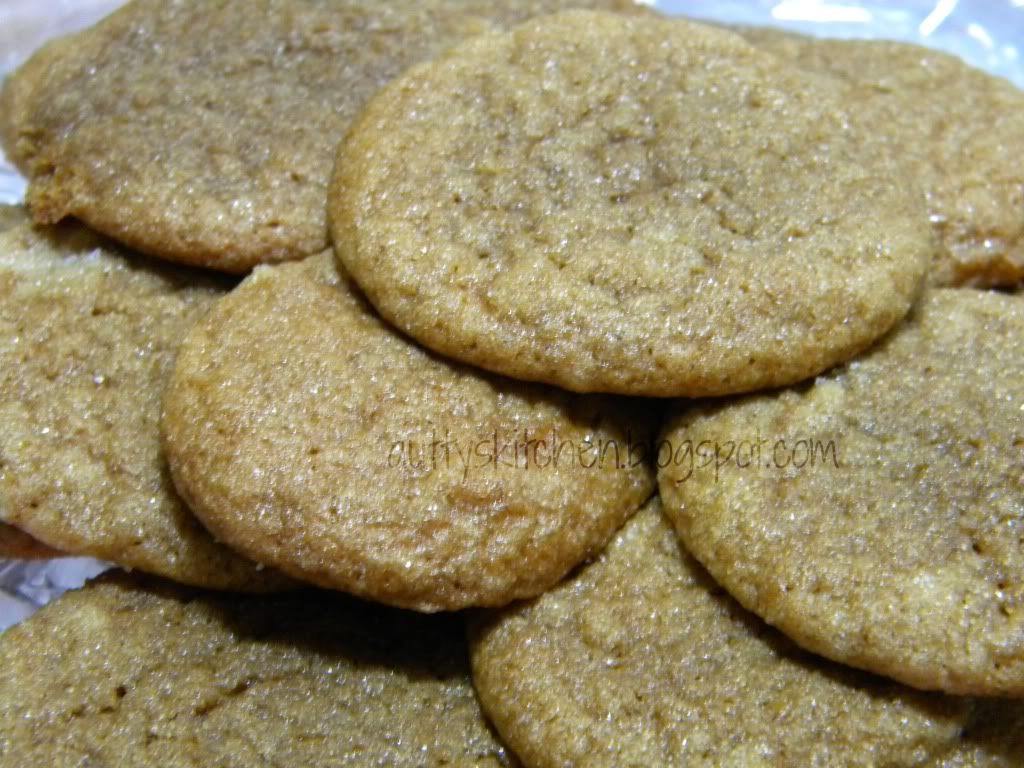
Molasses Sugar Cookies
These are my Mom's all time favorite cookies. When I asked her what cookie she wanted me to bake she said this one, hands down. These are so good and actually addicting. I've eaten my fair share and so had my Mom. I wont tell how many I have eaten because it is a disgusting amount. tis the season! This recipe is really old, it even is written in "old" lingo, which I think is really cool. I didn't know what oleo was until I asked my Mom. Turns out, that is what they used to call butter. ! :O
What you will need:
- ¾ cup Butter - melted
- 1 cup Sugar
- ¼ cup Molasses
- 1 Egg
- 2 teaspoons Baking Powder
- 2 cups Flour
- ½ teaspoon Ground Cloves
- ½ teaspoon Ground Ginger
Directions:
Melt Butter and allow to cool.
Add Sugar, Molasses, and Egg to mixer, beat well.
Sift dry ingredients and add to wet ingredients, mix well.
Let dough chill at least 3 hours or over night would be BEST.
Preheat over to 375°F
Bake for 8-10 minutes.
Tips!
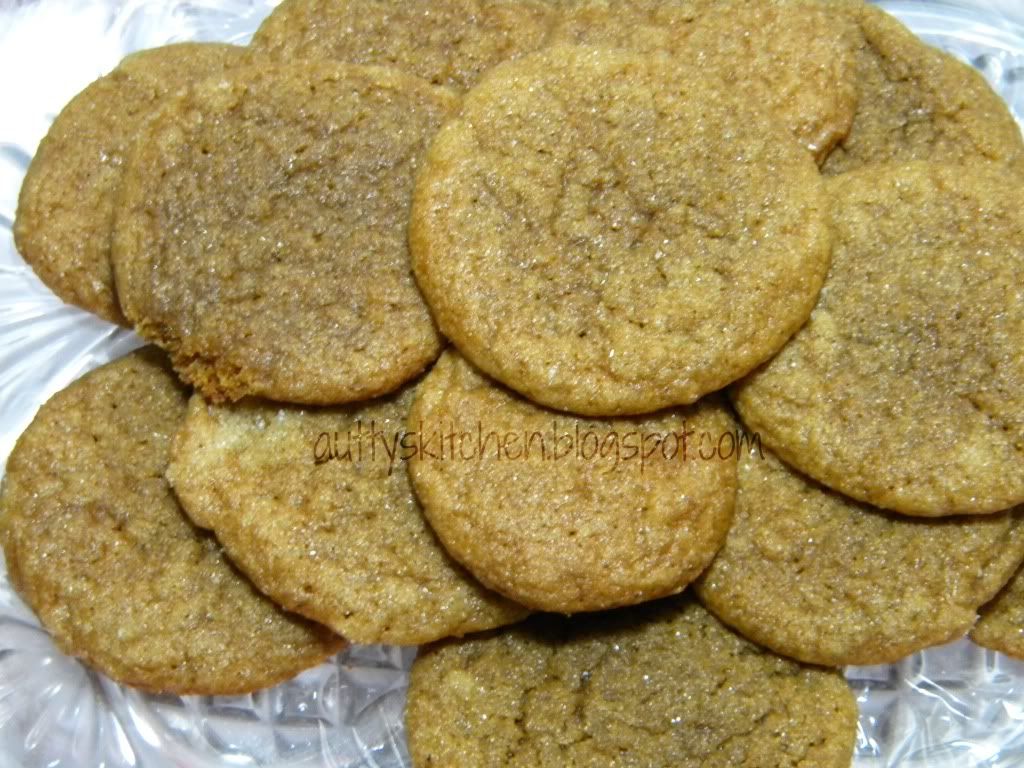
♥ROLL them in sugar before you bake them. They come out 10x better if you do that step. It doesn't call for it in the recipe, but that is what I have always done when I make these.
♥If you use two pans at a time, start them at 4 minutes, switch the pans and go for another 4 minutes. you could go longer, but with 8 minutes, they stay soft and chewy. If a firmer cookie is wanted cook longer.
Let me know if you try this out how you like it!! xx

Wednesday, December 19, 2012
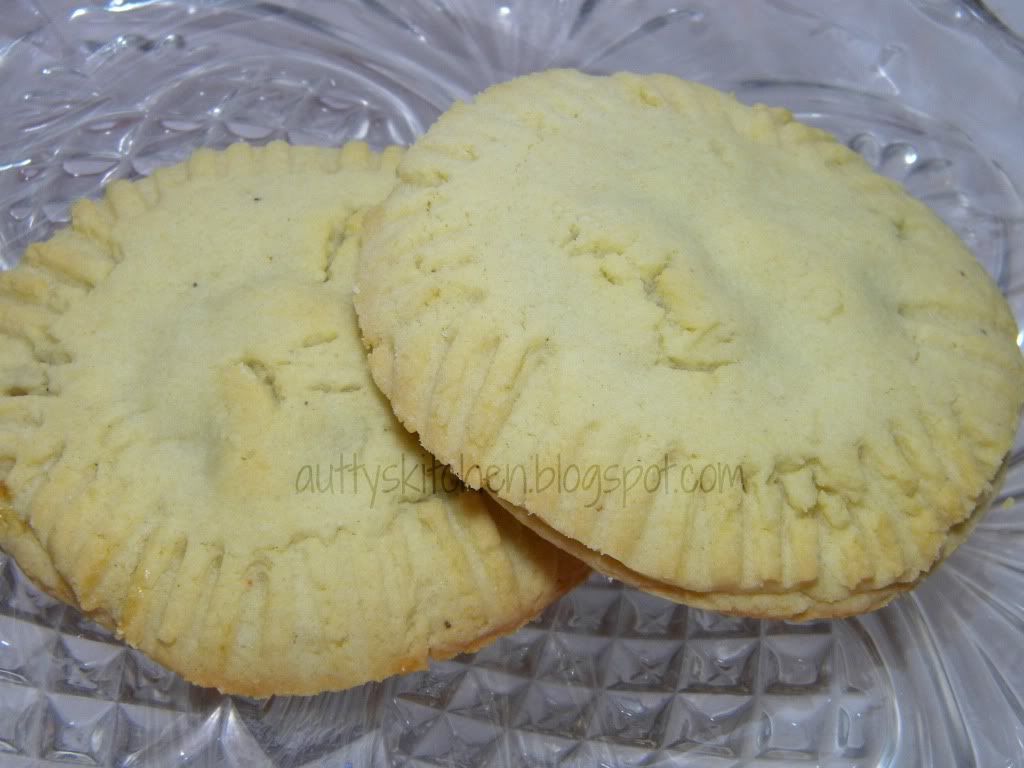
Raisin-Nut Filled Cookies
My Dad wanted raisin-nut filled cookies and I've never made them before, so I went searching on the good ol' trust Google. I figured I would give it a try. These were a bit difficult for me to make to be honest. It took me almost 3 hours. From having to cook the filling to mixing and rolling the dough. If you live in Florida, you know the humidity and how hard it is to roll out dough. It just does not want to work out.I myself am allergic to pecans, so I opted for walnuts. I don't eat nuts or raisins, so I wont be enjoying these cookies. However, I made Chris, My Mom, Brother AND Dad try these and they all said they were fantastic! :D Which makes me proud because this was my first time making them. These smell absolutely amazing, it kind of stinks that I can't eat them. I do plan on making this recipe, but using jam instead. :) You really can switch up the filling to whatever suits your taste!

If you try this let me know! I would love to know what you think of it and if you switch up the recipe!
Filling:
1 cup (201grams) granulated sugar
2 tablespoons cornstarch
1 cup boiling water
1 cup (136) raisins
1 cup (122grams) nuts (pecans or walnuts)
1 teaspoon vanilla
Dough:
1 cup (201grams) granulated sugar
1 cup (220grams) brown sugar
1/2 cup (1 stick) (113grams) unsalted butter, softened
1/2 cup (102.5grams ) shortening
3 eggs
5 cups (640grams) flour
3 teaspoons baking powder
½ teaspoon salt
¼ teaspoon nutmeg
1 teaspoon baking soda
1 tablespoon buttermilk
1 teaspoon vanilla
- To make filling, combine all ingredients in a saucepan and cook until thickened. Let cool.
- Preheat oven to 350°F (177°C)
- To make dough, combine granulated and brown sugar with butter and shortening; cream well; add eggs and blend. In a separate bowl, sift flour with baking powder, salt, nutmeg and baking soda. Add to creamed mixture along with buttermilk and vanilla.
- Roll dough 1/8-inch (3.2mm or 0.32cm) thick on floured board and cut with cookie cutter. Place 1 tablespoon of filling on a cookie; place another cookie on top, press edges together. Seal with a fork. Place on a greased baking sheet. (or use parchment/grease proof paper)
- Bake for 10 to 15 minutes, or until lightly browned.
TIPS:
♥These cookies can be made omitting the nuts. I made 2 mixtures, one with nuts and one without. The one without you have to cook a bit longer before it starts to thicken.
♥If you don't like raisins or nuts, you can also just fill them with jam.
♥In my person opinion, instead of rolling out two rounds for a top and bottom, put the filling on one side of the round and fold it in half. It would be a better cookie-filling ratio.
♥You can also use an egg wash (1 egg and 1 tablespoon water) and brush over top for a glossy look, it will also help to brown it more. I did not do this step on mine.
♥You can really use any filling or nuts.
♥For this recipe I suggest using only one circle of dough and folding it over in half instead of two pieces of dough. I felt that having two pieces of dough was a bit much, then again that it just me.
♥For this recipe I suggest using only one circle of dough and folding it over in half instead of two pieces of dough. I felt that having two pieces of dough was a bit much, then again that it just me.
If you try this let me know! I would love to know what you think of it and if you switch up the recipe!
Monday, December 17, 2012
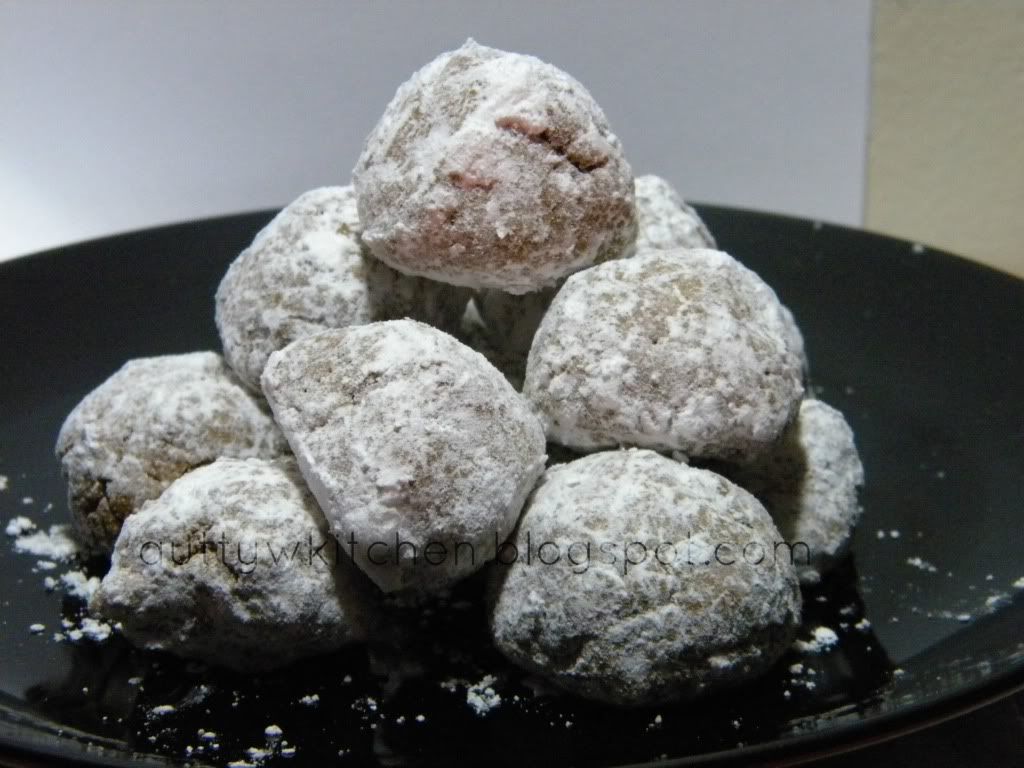
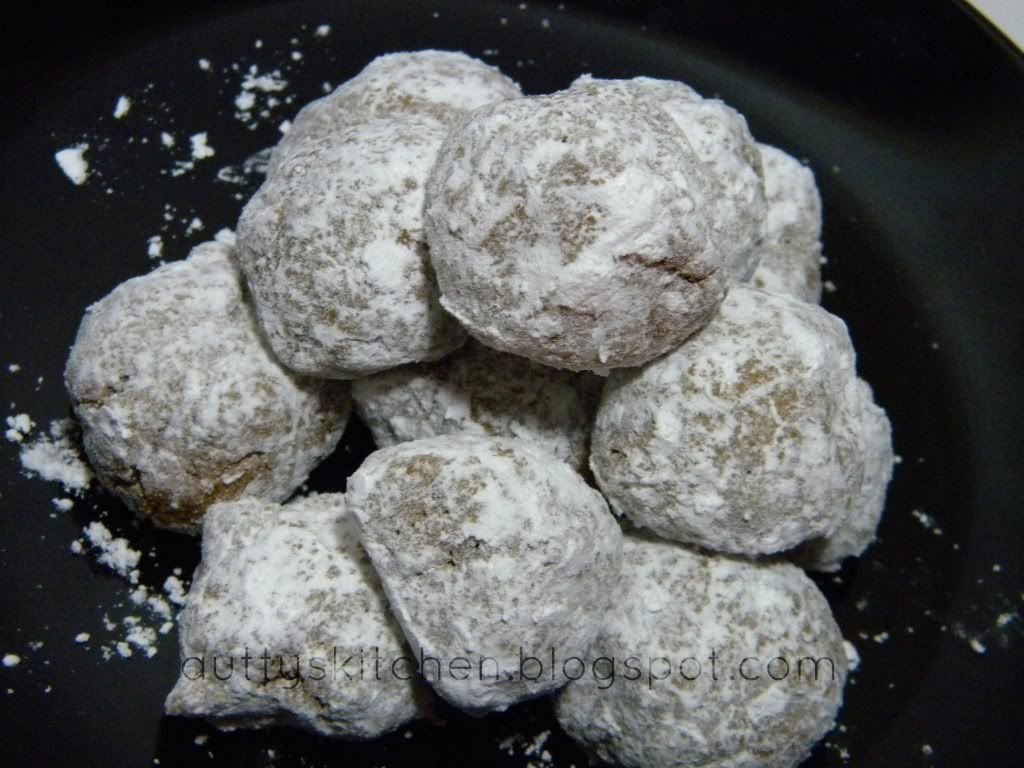
Pfeffernüsse
Pfeffernüsse cookies are of German decent. The name translates too pepper nuts in German. These cookies are spicy (not the hot kind of spicy) tasting, but kind of remind me of Gingerbread to a point because of the molasses and cinnamon. Some recipes call for almond or walnuts but this particular recipe does not. This recipe does call for black pepper, even though some recipes don't. Pfeffernüsse are typically very hard when cooked and soften with age, but these are slightly hard on the outside and soft on the inside. They are the perfect blend of softness to "hardness" in my opinion.
This recipe is one from Chris' family and this was the first time that I ever had made them, it was even his first time as well so I had no idea what to expect! These turned out better than I thought they would have! Especially after having a bad experience with the store bought ones. These I feel will become a tradition to make for the Holidays.
Pfeffernüsse
3/4 cup Light Molasses (225g)
1/2 cup Butter (113g)
2 Eggs
4 1/2 cups Flour (576g)
1 1/4 tsp Baking Soda
1 1/2 tsp Ground Cinnamon
1/2 tsp Ground Cloves
1/2 tsp Nutmeg
Dash of Pepper
Confectioner sugar (icing sugar) *you maybe will need 1/4 cup (34g) IF that*
- Preheat oven to 375°F (190°C)
- In a saucepan, combine molasses and butter. Cook and stir till butter melts. Cool to room temperature
- Stir in 2 beaten eggs.
- Sift together flour, sugar, baking soda, cinnamon, cloves, nutmeg and pepper.
- Add to molasses mixture; mix well.
- Chill well. (About 2 hours)
- Shape dough into 1-inch balls.
- Bake on greased cookie sheet for 12 minutes. Cool slightly; roll in confectioners sugar.
I basically took these straight off of the pan to the confectioners sugar and has no problem with the cookies being too hot. Since you are not holding them for a long period of time, you won't feel the heat.
Tips:
●These don't have to be perfectly rounded balls, mine definitely were not. Mine were a bit flat on the bottom, that way they were a bit easier to manage on the sheet. These don't have to be a certain length apart on the cookie sheet either, since they don't really spread out.
●If the mixture looks funky and crumbly to you, no worries! On my first time making them, that gave me a heart attack because I was convinced I made the dough the wrong way. Just make sure to kind of pack it together lightly, don't make it too tight or then the cookie will be too dense.
● You could also leave the powdered sugar off, but then it wouldn't be a real Pfeffernüsse cookie. But, it's really your preference.
If you make these cookies send me a picture! I would love to see how yours come out!
Friday, December 14, 2012
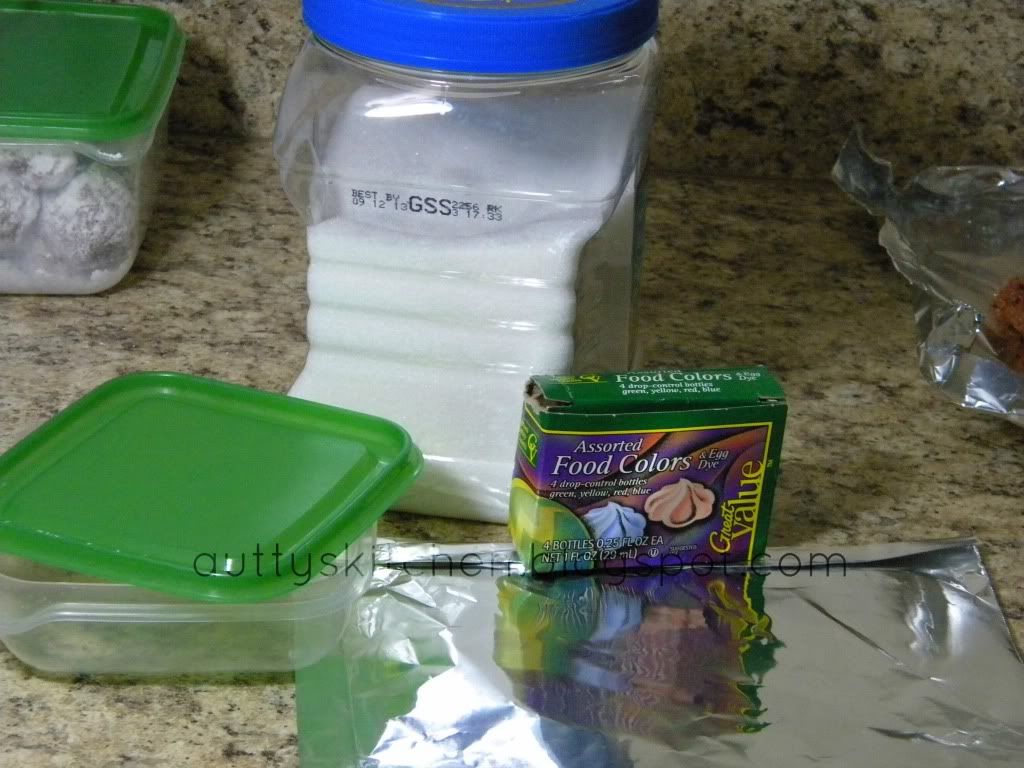
DIY Colored Sugar Sprinkles
Hello everyone!
Today I have a DIY kind of "recipe" for you! It's fun enough you can do it with your kids if you have any! I would have done this with my nephew if he was over.. and if I wouldn't have been doing it at midnight. Hah

Today I have a DIY kind of "recipe" for you! It's fun enough you can do it with your kids if you have any! I would have done this with my nephew if he was over.. and if I wouldn't have been doing it at midnight. Hah
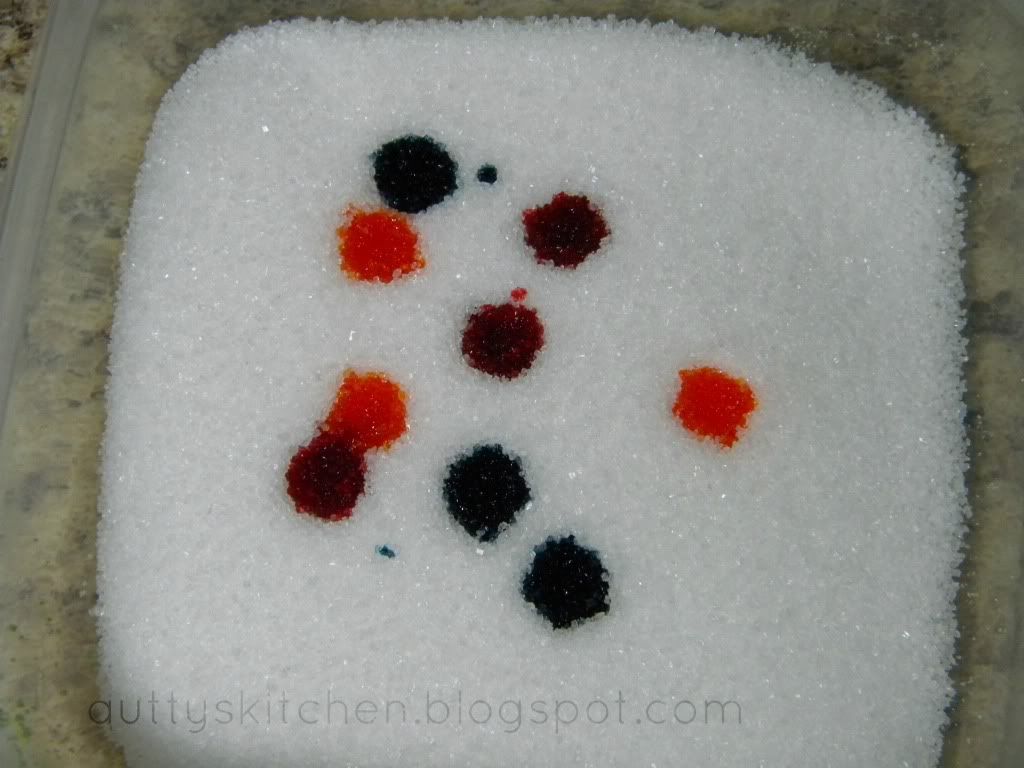
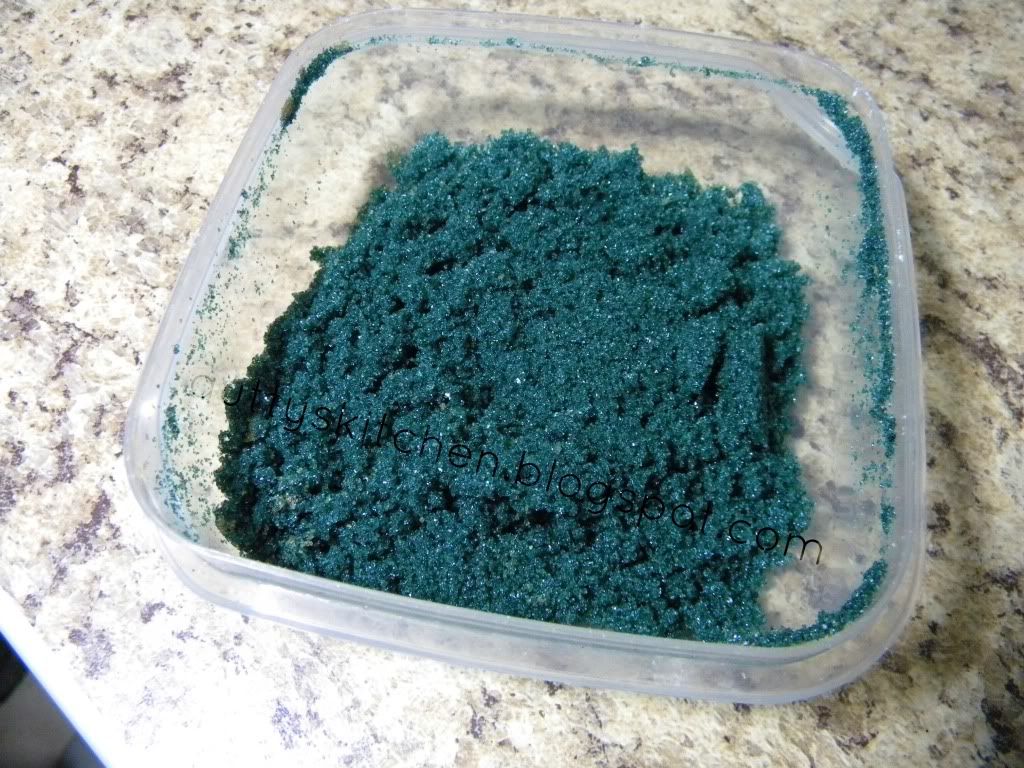
Yup! This is all of the colored sugar that I made! It was really fun and the longer that it dries before you use it the more it looks "glittery". It's really neat and a cool way to decorate Christmas cookies, or just cookies in general. And you don't have to worry about buying the sprinkles from the store that taste horrid. These taste just like sugar regardless of the food coloring in it!
These are the supplies you will need! (minus the cookies in the upper corner. Recipe soon!)
You will need::
- Sugar
- LIQUID Food Coloring
- Aluminum Foil
- Container to shake sugar in
- Ziploc sandwich baggies, or whatever else to store the sugar in
- Measuring cups, or if you use metric a scale
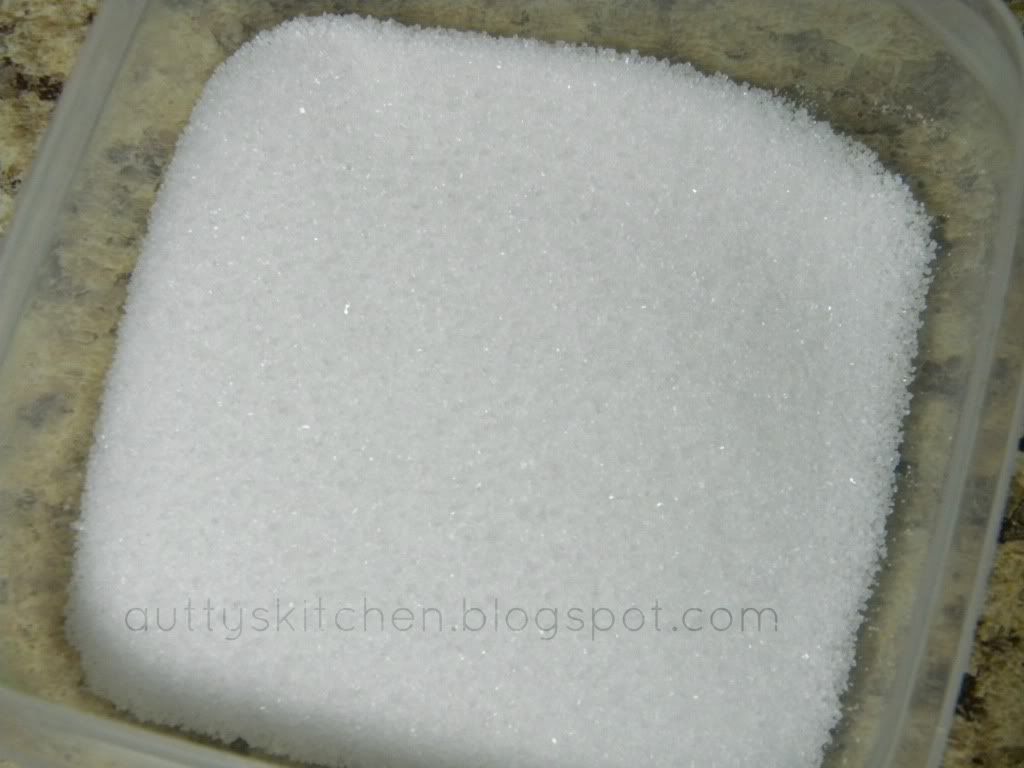
♥Measure out 1/4 cup (50g) Sugar (caster sugar)
♥Choose the colors that you want to use for your sugar.
♥For this particular one I used 3 drops of Yellow, Blue and Red. (I wound up adding quite a bit more blue)
♥(I've read where people suggest doing 1 drop of food coloring at a time, but I found no ill-effect of adding multiple drops together. However, you do need to shake a bit more to break up the sugar that soaked up the color. Which is really no problem because it works the color in more)
This is the color that mine turned out. Please remember I did add quite a bit more blue to get it to this color.
♥Once your sugar is fully mixed take a section of aluminum foil and spread the sugar out into a layer to dry.
♥Let dry for 1 hour.
♥Once dry transfer the sugar into whatever you plan on storing this in.
I made a red sugar as well, which is not pictured. I had to use quite a lot of red food coloring to get the right color. So be mindful of that. Also! In the top set of pictures, that is the true-ish color of each of the sugars. I really just mixed colors until I got the color I wanted. I wound up with a highlighter orange, hot pink and a lavender that did not photograph. That green is also really that bright. Crazy huh?!
If you decide to do this, let me know! I really would love to see the colors that you all come up with!! I think this is a really fun idea for the whole family!! Just remember that if you do it with kids, make sure the lid is on tight, that way you don't end up with a mess. :)
Tuesday, December 11, 2012
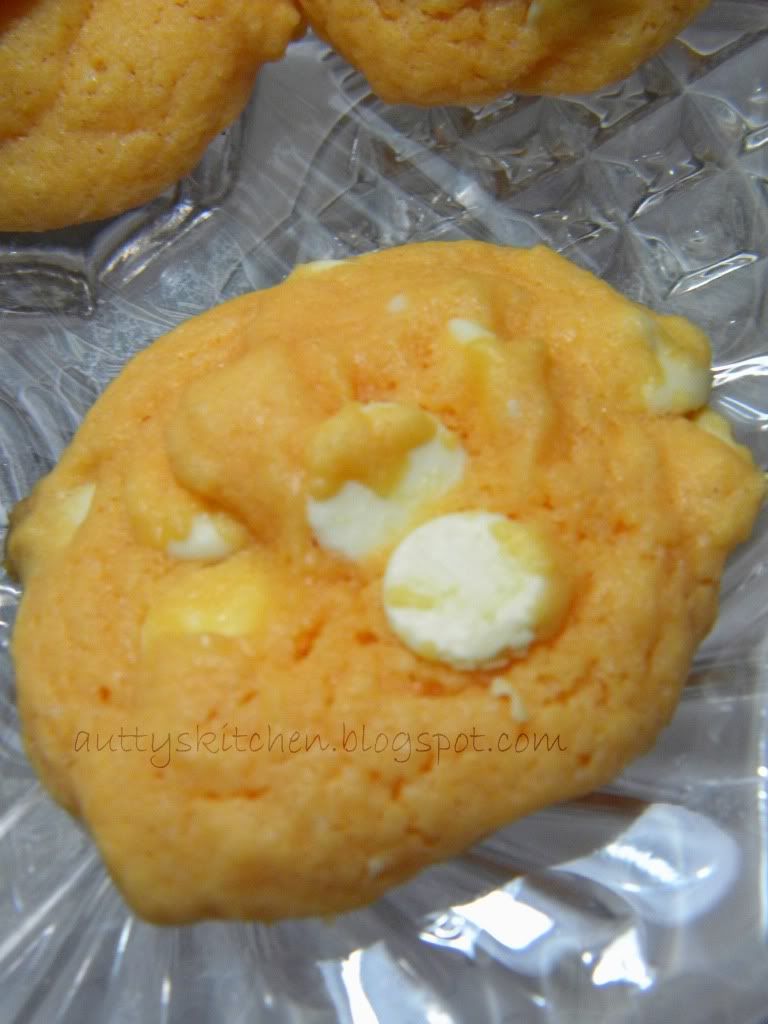
Orange Creamsicle Cookies
These cookies have been a family favorite since around 2008 when we first found the recipe. My family absolutely LOVES these, especially my brother. I myself am not a fan, but I don't like orange creamsicle flavored things lol. I'm thinking of putting semi-sweet chocolate chips in, just to mix it up. :P Maybe then I will eat them. Hahah.
Not only does my family love these. These are a huge crowd pleaser every time we make them. They disappear pretty quickly from the cookie plates! I hope you all enjoy this recipe as much as the people around me do! :)
Ingredients:
1 ¾ cups (232 grams) all-purpose flour
1 package (.15 ounce) unsweetened orange drink mix, such as Kool-Aid
½ teaspoon baking soda
½ teaspoon baking powder
½ cup (1 stick)(113 grams) unsalted butter, softened
1 cup (201 grams) sugar
2 eggs
1 teaspoon orange extract
1 ¼ cups white baking chips
(I couldn't figure out the conversion for this, if you know it please let me know down in the comments!)

Tips:
♥ If the edges start to brown, that is okay. As long as the cookie itself turns brown, it is way over baked.
♥If you happen to make these smaller then a rounded tablespoon, adjust the time accordingly. I made some using a teaspoon and the edges started to brown when cooked for 10 minutes.
♥It does not matter what brand of orange drink mix you use. They are all the same but made by different brands. Just make sure it is in one of those packets and is unsweetened.

(I couldn't figure out the conversion for this, if you know it please let me know down in the comments!)
- Preheat oven too 350°F (177°C)
- Combine flour, drink mix, baking soda and baking powder in a bowl and set aside
- Cream together softened butter and sugar. Add eggs and orange extract and beat until blended.
- Stir in white baking chips by hand
- Drop rounded tablespoons of dough on lightly greased cookie sheet. (you could also use parchment paper/grease proof paper)
- Bake for about 10 minutes. Do NOT wait for edges to brown. Cookies should be slightly under baked. Immediately remove to rack and cool.
Makes approximately 2 ½ dozen
Tips:
♥ If the edges start to brown, that is okay. As long as the cookie itself turns brown, it is way over baked.
♥If you happen to make these smaller then a rounded tablespoon, adjust the time accordingly. I made some using a teaspoon and the edges started to brown when cooked for 10 minutes.
♥It does not matter what brand of orange drink mix you use. They are all the same but made by different brands. Just make sure it is in one of those packets and is unsweetened.
I hope you all try this recipe out and enjoy them! let me know down below or tweet me on twitter! I would love to know! xx
Cheeseburger Rice
Hello Loves!
This is another one of those recipes that I found on pinterest a LONG time ago and just don't remember where I found it. However I have adapted it for Chris and I. :) This tastes JUST LIKE a McDonalds cheeseburger, but without all of that nasty crap that is in a McDonalds burger. :) Chris and my brother eat this up like it is going out of style!
What you will need:
- 1 pound of ground beef or turkey
- 1 cup of rice
- Ketchup
- Mustard
- Garlic Powder
- Onion Powder or Minced Onion
- Salt & Pepper to taste
- Cheese
I used the 5 minute rice because I don't have a rice cooker as of yet, and it is just easier for me to do it that way. :P
As you start your water to boil heat your pan that you plan on cooking your meat in. Cook your rice per however you cook your rice.
Brown said meat. (you can use any meat you would like honestly. I use either ground turkey or ground beef.)
As the meat is browning add your Garlic Powder and Onion to season the meat. (I typically just use onion powder)
When the meat is brown and the rice is done, add the rice to the pan with the meat and stir.
Add Ketchup and Mustard. (for this, it depends on your taste. I use around 6 tablespoons of mustard and 5 of ketchup. That is APPROXIMATE. I typically just squirt it in without measuring)
Add your cheese as well at this point. (it doesn't matter what kind of cheese, whichever you prefer is good. I normally use Cheddar, but in a pinch I sometimes use that parmesean cheese powder.. stuff that you put on pasta.)
Salt and pepper to taste!

I know it doesn't look pretty, but it tastes absolutely amazing! :D
Just like with any recipe, don't be afraid to adapt this to your tastes!

Monday, December 10, 2012
Converting Recipes
Hello everyone!
I wanted to let you all know that I am going to convert all recipes to the best of my ability! I'm converting them into metric, so for those of you who are overseas will be able to make the recipes as well! I really hope that all of the information is correct, to the best of my knowledge it is, so I really hope that it is!
I'm going to be purchasing a kitchen scale in the VERY near future, so I will be able to convert the recipes to the exact weight that they are. If you see any information that is NOT correct, please please please let me know! That would be absolutely amazing! :)
Thank you!
xxAutumn
Friday, December 7, 2012
Roasted Chick Peas
Hello Lovelies!
Yes, I have another recipe for you! This one however is not so guilt inducing as the previous ones have been!
A little back story.. A looong while ago I was on Pinterest and found this recipes for Roasted Chick Peas.. granted I don't remember the recipe that they used, I've kind of adapted it to my tastes. Anyways, I was looking for "healthier" options for snacks because I am just tired of munching on unhealthy things. I go through phases like that, where I want to eat healthier but it just doesn't happen. BUT I came across roasted chick peas and decided to give it a go!
Now this is NOT the first time I have made these! They have slowly became and addiction of mine and I can eat way more than I should.. They are that yummy.

All you need is
a can of Chick Peas (also called Garbanzo beans)
a Tablespoon of Oil
Seasonings (more on that in a minute)
Preheat your oven too 425°F (218°C)
- Take your pan (make sure it has sides on it. Don't want your chick peas rolling out the side.. I also use a jelly roll pan or a cookie sheet with sides) and line it with some aluminium foil.
- Spread your washed and drained chick peas on your pan in one single layer.
- Drizzle your oil over the peas. (Don't worry, it doesn't seem like a lot of oil, but its enough)
- Toss the chick peas around to coat them.
- Season to your taste! (I typically use Salt, Pepper, Cayenne Pepper, Garlic Powder, Onion Powder)
- Then toss once again to coat in seasonings.
There really is "right" amount of seasoning. Just season them to taste, I never measure how much I use if that helps, I just sprinkle all over.
When the oven is preheated put your pan in and set your timer for 15 minutes.
If you hear popping, don't be alarmed! It's just the chick peas bursting their shells!
After the 15 minutes is up, take the pan out and mix them around just to move them around.
Put BACK into the oven for another 15 minutes.
This makes them crunchy.
Voilá! You have yummy Roasted Chick Peas!

These honestly are a really good replacement for chips. HOWEVER, they do not stay crunchy after a few hours, so If you are definitely wanting that crunchy, only make one can at a time. They are still really good when they are not crunchy, but if you prefer that crunch, eat them within the hour that they come out :)
Let me know if you make them and how they turn out!! <3 p="p" xx="xx">

Monday, December 3, 2012
Oh!
Oh! I also want to let you know that the next two recipes have my Beauty Blog address on them, because that is how I typed them and edited the pictures. So please be aware of that. :) The rest of the pictures for the upcoming recipes after the next two are going to have this blog address.
I am also trying to figure out Scheduling stuff for the two blogs. I'm thinking Tuesday and Friday for here and whenever else for my Beauty blog. That is how I have it set up at this current moment :) I already have a recipe set up for Friday and one set up for Tuesday, then I am going to put up some Christmas Cookie and other Christmas-y related recipes :)
I hope you all enjoy this blog! :D
Gingerbread Cheesecake
Hello Everyone!


I wanted to use up the last of the cream cheese that was in the fridge that was left over from the wedding so Chris and I decided we wanted to try and make a cheesecake!
I used the Cheesecake recipe from my Brownie Bottom Cheesecake. It's really simple to make!
2 8oz. packages of Cream Cheese (softened)
3/4 cup Sugar
2 eggs
1 Tablespoon of Torani Gingerbread syrup
3/4 cup Sugar
2 eggs
1 Tablespoon of Torani Gingerbread syrup
(I would suggest using more. The gingerbread flavor was not as prominent or noticeable as I would have liked)
1 shortbread crust (you can really use any kind of crust you want!)
- Pre-Heat oven to 350F (176C)
- Mix Cream cheese, sugar, eggs and syrup together until smooth
- Taste mixture to make sure it is Gingerbread-y enough for you (lol)
- Pour mixture into crust
- Bake for 40 - 45 minutes (the cheesecake will more than likely NOT go brown around the edges unless you cook it for longer)
The good thing about this is that it is not as rich as a normal store bought cheesecake is. You don't feel as guilty eating a piece! It's not overly sweet either.
Mind you the center of this is white and the top is only slightly yellow. The reason is cracked is because Chris put it in the fridge without covering it and before it was fully cooled D:
These aren't terribly fantastic pictures, but I think you get the point :P
Let me know if you try this recipe out! I would absolutely LOVE to know how it came out! You can play around with the flavors as well!
Disclaimer: I received the Torani Gingerbread Syrup for free from Torani and Shespeaks up. This is a sponsored post on that aspect. That however does not affect my opinion! All opinions are 100% my own and nothing will ever change that! I am not being paid by either company to do this blog post!
Ps. Yes, I know I am supposed to be starting a diet. However, I am waiting on something so I have not exactly started it. HOWEVER, because of that, I am NOT going to start baking. :) Chris or others in my family will be the testers! :P So, since it is the Christmas season, be prepared for a lot of indulgent posts! :P I'm making my Mom's Orange Creamsicle cookies this year, among a few other things. I will be sticking to a diet however in the next week or so.
Brownie Bottom Cheesecake
Hello loves!
I know, I know. This totally does not go with the whole weight loss thing that I was talking about in the last blog post. Well, I made these before Chris finally sprung the whole idea that he wanted to start then! Bah. Men gotta love them!
Anyways, My Grandmother gave me this recipe book as part of a wedding present and I couldn't wait to dig into it! The book is called Quick fixes with mixes by Lia Wilson. I was looking for a recipe to use the extra cream cheese that we had from the wedding and boy o boy, there are so many! But this one I just HAD to make. Maybe it was my period (TMI? LOL) wanting me to make it, but we ran out and got the only ingredient that we didn't have :P
Needless to say, these are now going to be a treat! They are really easy to make, considering there is a cheesecake aspect to make but its super easy I promise! Now these have an option to make a chocolate frosting with it, but I omitted that part, because it would have been WAY too much with it in my opinion. I will add the recipe to that at the bottom just in case you want to make it :) I will also add what I changed/did at the bottom! Anything that is in Italic are notes from myself.
Ingredients:
- 1 (18.25 ounce) devil's food cake mix (with of without pudding)(yes you are using a boxed cake mix, but you can't even tell!)
- 1/2 cup Butter or margarine (I used margarine because that is what I had left over)
- 3 eggs, divided (see the directions)
- 2 (8 Ounce) packages of cream cheese, softened
- 3/4 cup Sugar
Directions:
- Preheat oven too 325°F (162°C). In large bowl, combine cake mix, butter and 1 egg; blend well. Press mixture into bottom of greased 9" x 13" baking pan. (see below for what I did. Also, the mixture is going to be EXTREMELY thick, you will basically be able to use your hands. Spray them with a little baking spray to press it down)
- In medium bowl, combine remaining eggs, cream cheese and sugar. Beat until mixture is smooth and blended.
- Pour mixture over cake mix and bake for 40 to 45 minutes (until edges are very lightly browned). Let cool and ice with Chocolate Frosting. (see below)
Chocolate Frosting
Ingredients:
1 cup semi-sweet chocolate chips
1 (8 ounce) container sour cream
Directions:
In a small saucepan, combine chocolate chips and sour cream. Cook over low to medium heat, stirring constantly, until chocolate melts and mixture is smooth. Remove from heat and let cool until just warm to the touch.

As you can tell, I made cupcakes. This is where the changes come into place! It has nothing to do with the recipe, just more of baking and how to proportion it to each cupcake.
If you are using a regular sized cup cake tin (yes there are different sizes IE: mini, jumbo etc..)
I used a 1 ounce disher for the brownie mixture, but you can use less. You just have to remember not to fill it too much because it IS a cake so it will rise. Some of mine puffed over the top because I either added too much brownie or too much cheesecake. I would suggest maybe using a little more than half of the disher, or you could always measure it to your liking. This is just what I did.
For dishing the cheesecake, I used between 1-2 tablespoons per cupcake wrapper. Once again, it depends on how much of the brownie mixture you put in the bottom.
As for time, I only put them in for 20-25 minutes. No more than that, or the cake could start to dry out. I felt that this was a reasonable amount of time, considering it was not going to be a HUGE batch in cake form. Since these are smaller, you do not need to put them in for longer than 25 minutes. I put a batch in for 30 minutes and had to take it out at 23 minutes because they started to brown. I don't think that you NEED to let these brown, they are incredible without the browning. It would be just for mere color.
In cupcake form, I made around 24 cupcakes. but that could change depending on how much brownie mixture you have left because I had more cheesecake then brownie!

As you can tell, the cake in the middle did not rise much, which is good because I thin kit is a nice touch that the cheesecake sank into the middle instead of rising out. That way you get a little extra in each bite!
Now as for mixing other flavors into the cheesecake, I personally did not do it this time around because it was my first time making these. I definitely think that you could add a flavoring into the cheesecake mixture. Not into the brownie mixture because you need it to be thick, so in my opinion it would be better to flavor the cheesecake portion.
I hope you all try these out! Let them know what you think of them! I think they are absolutely fantastic! I have to send them to work with Chris or I will eat them all and it will not go well with my upcoming diet! :P Good thing I have something to do with all of the baking I plan on doing this year! Sending it with Dad to Busch Gardens (he works there) and with Chris to work! Hahah
I hope you all are having a lovely day! <3 p="p">
Poor Man's Pasta
Hey everyone!!
So, I really want to post recipes on my blog that I really love. I hope that is okay with everyone!
Now, this really doesn't have a name. The reason I gave it a name is because it's a really cheap, no more than $5 at most!
My parents made this a lot when I was a kid, because we were short on money. You would think that I would have gotten over it but I still love it just as much as I did when I was a kid.
All you are going to need is:
-Cream of Mushroom Soup.
(you can use any soup really as long as its Cream of something. It's tasty with anything!)
-Mixed Vegetables
(I suggest canned.)
-Dry Pasta
(Use any kind you want! =^_^=)
~Make your pasta as normal. Cook it to Al dente (cooked to the tooth)
~Drain your pasta really good and return it to the pot you cooked your pasta in.
~Add your soup and your vegetables.
~Stir and add salt or other seasonings as you wish!
It's really that easy honestly and is so yummy!
if you find 1 can of the vegetables or the soup is not enough you can absolutely add more to it! Just using 1 can of each and 1 pound of pasta is enough for 4+ people depending on how you eat!

You don't have to use the expensive name brand products. I just bought the generic stuff. It's just as good and even sometimes better than name brand!
This is what I payed
Happy Harvest Mixed Vegetables from Aldi $0.59
Nice! Cream of Mushroom Condensed Soup from Walgreens $1.12
And I just used penne pasta. It was from Walgreens as well and was $1.59
So figure without tax I spend $3.30!
[slideshow]
I really hope you try this out! Let me know what you think!!
Welcome!
Hello Hello!
I know this is like the millionth time I have started a second blog, but in reality, I just keep changing the name of this one and deleting the OLD content so that it will be relevant to what is going on at the time!
So, if you follow my beauty blog http://auttyw.com you will have noticed that I have started to post recipes, I got some feedback from some people and they wished for me to keep that blog mainly beauty related, so here I am posting recipes here! :) I'm pretty excited to get this going! I have quite a few good ones coming up! .. and quite a few that I need to cancel and transfer over to this blog :P
The ones that are already posted on that blog are going to stay there, but I am also going to put them here as well :)
Have a lovely day!
xx Autumn
Subscribe to:
Posts (Atom)